
Vapi Integration
Vapi integration allows for more realistic telephone calls and can easily be implemented on existing agents from past examples in just a few steps. For more information on Vapi, visit their website here.
Vapi Account Creation
- Navigate here and sign up to use Vapi.
- Once you've created an account, log in and navigate to "Account" on the left-side navigation.
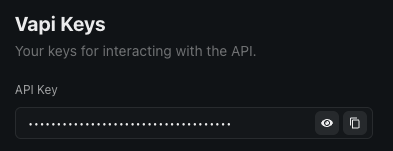
- Copy the "API Key" to your clipboard.
- Navigate to "Billing" on the left-side navigation and add a "Payment Method" allowing you to purchase Vapi credits and set a "Monthly Usage Limit."
Without adding a "Payment Method," the Newo system will not be able to purchase a phone number when creating a Vapi integration.
Add Vapi Integration Settings
In order for the Newo.ai platform to communicate with your Vapi account, your API needs to be added.
- Navigate to the Integrations page from the left-side panel on the Newo.ai platform.
- Click the gear icon on the "Vapi Integration" item.
- Paste your Vapi "API Key" from your clipboard into the available field.
- Click Save.
Create a Vapi Connector
A Vapi connector needs to be created, which will be used to create an Event Subscription.
- Click the plus icon on the "Vapi Integration" item.
- Fill in the connector "Title," "Idn" (identifying name), and a custom "Greeting Phrase" for when an agent first speaks to a user. It is advisable to use the format vapi_[phone number] for the "Title" and "Idn" to easily see the number being used for a particular connector. For example, vapi_6592272513. You can view the generated phone number by opening the Vapi connector settings again after you click Save.
- Add a "Disclaimer Phrase." The default phrase is "Absolutely. Please note that I am logging our conversation, allow me a couple of seconds of delay in my responses." This phrase is stated after the Greeting Phrase and after a user says something.
- Select the "Agent" you want to answer the phone. In this case, you can use an existing agent from past examples (e.g., "Embedded Instructions" or "Embedded Context" agents). If you’re using the Superagent framework, select the ConvoAgent.
- In the "Phone Area Code" field, type any US area code to select the area where your phone number should be registered.
- Specify the code of the "Language" you want your agent to speak. Use "en-US" for English.
- Set the "Enable the end-of-call report" value to "true" if you want the Vapi integration to send you "call_ended" and "call_aborted" events.
- Copy and paste a "Voice Provider" and "Voice Id" from the supported list below:
- Voice provider "deepgram" supports these voices:
- luna
- stella
- athena
- hera
- orion
- arcas
- perseus
- angus
- orpheus
- asteria
- helios
- zeus
- Voice provider "11labs" supports these voices:
- burt
- marissa
- andrea
- sarah
- phillip
- steve
- joseph
- myra
- paula
- ryan
- drew
- paul
- mrb
- matilda
- mark
- Voice provider "playht" supports these voices:
- jennifer
- melissa
- will
- chris
- matt
- jack
- ruby
- davis
- donna
- michael
- Voice provider "deepgram" supports these voices:
- Click Save.
Enable the Vapi Connector
Once a connector is created, its status will be "Stopped," and you will need to enable it.
- Click the three dots icon on the right of the created connector.
- Click Run.
Newo will automatically add a generated phone number on the Vapi portal. To view the generated phone number that you can call, either view the added number on the Vapi portal or click the plus icon again on the newly created Vapi connector.
A best practice is to add the generated phone number to your connector title to easily view it when creating an event subscription. Use the format "vapi_[phone number]."
Updated about 1 month ago