Newo Chat Integration (Demo Agent)
Unlike the Talking Head integration, which also includes a text-only option, the Newo Chat integration is only text. This integration enables a Digital Employee to communicate through web chat. The below steps highlight the process for demoing the Newo Chat on a website. If you're looking to make the Agent live on a website as well as change settings, go here.
Demoing the Agent allows you to test the web chat functionality on a website without needing to dig into the HTML of the website.
Enable the Newo Chat Connector
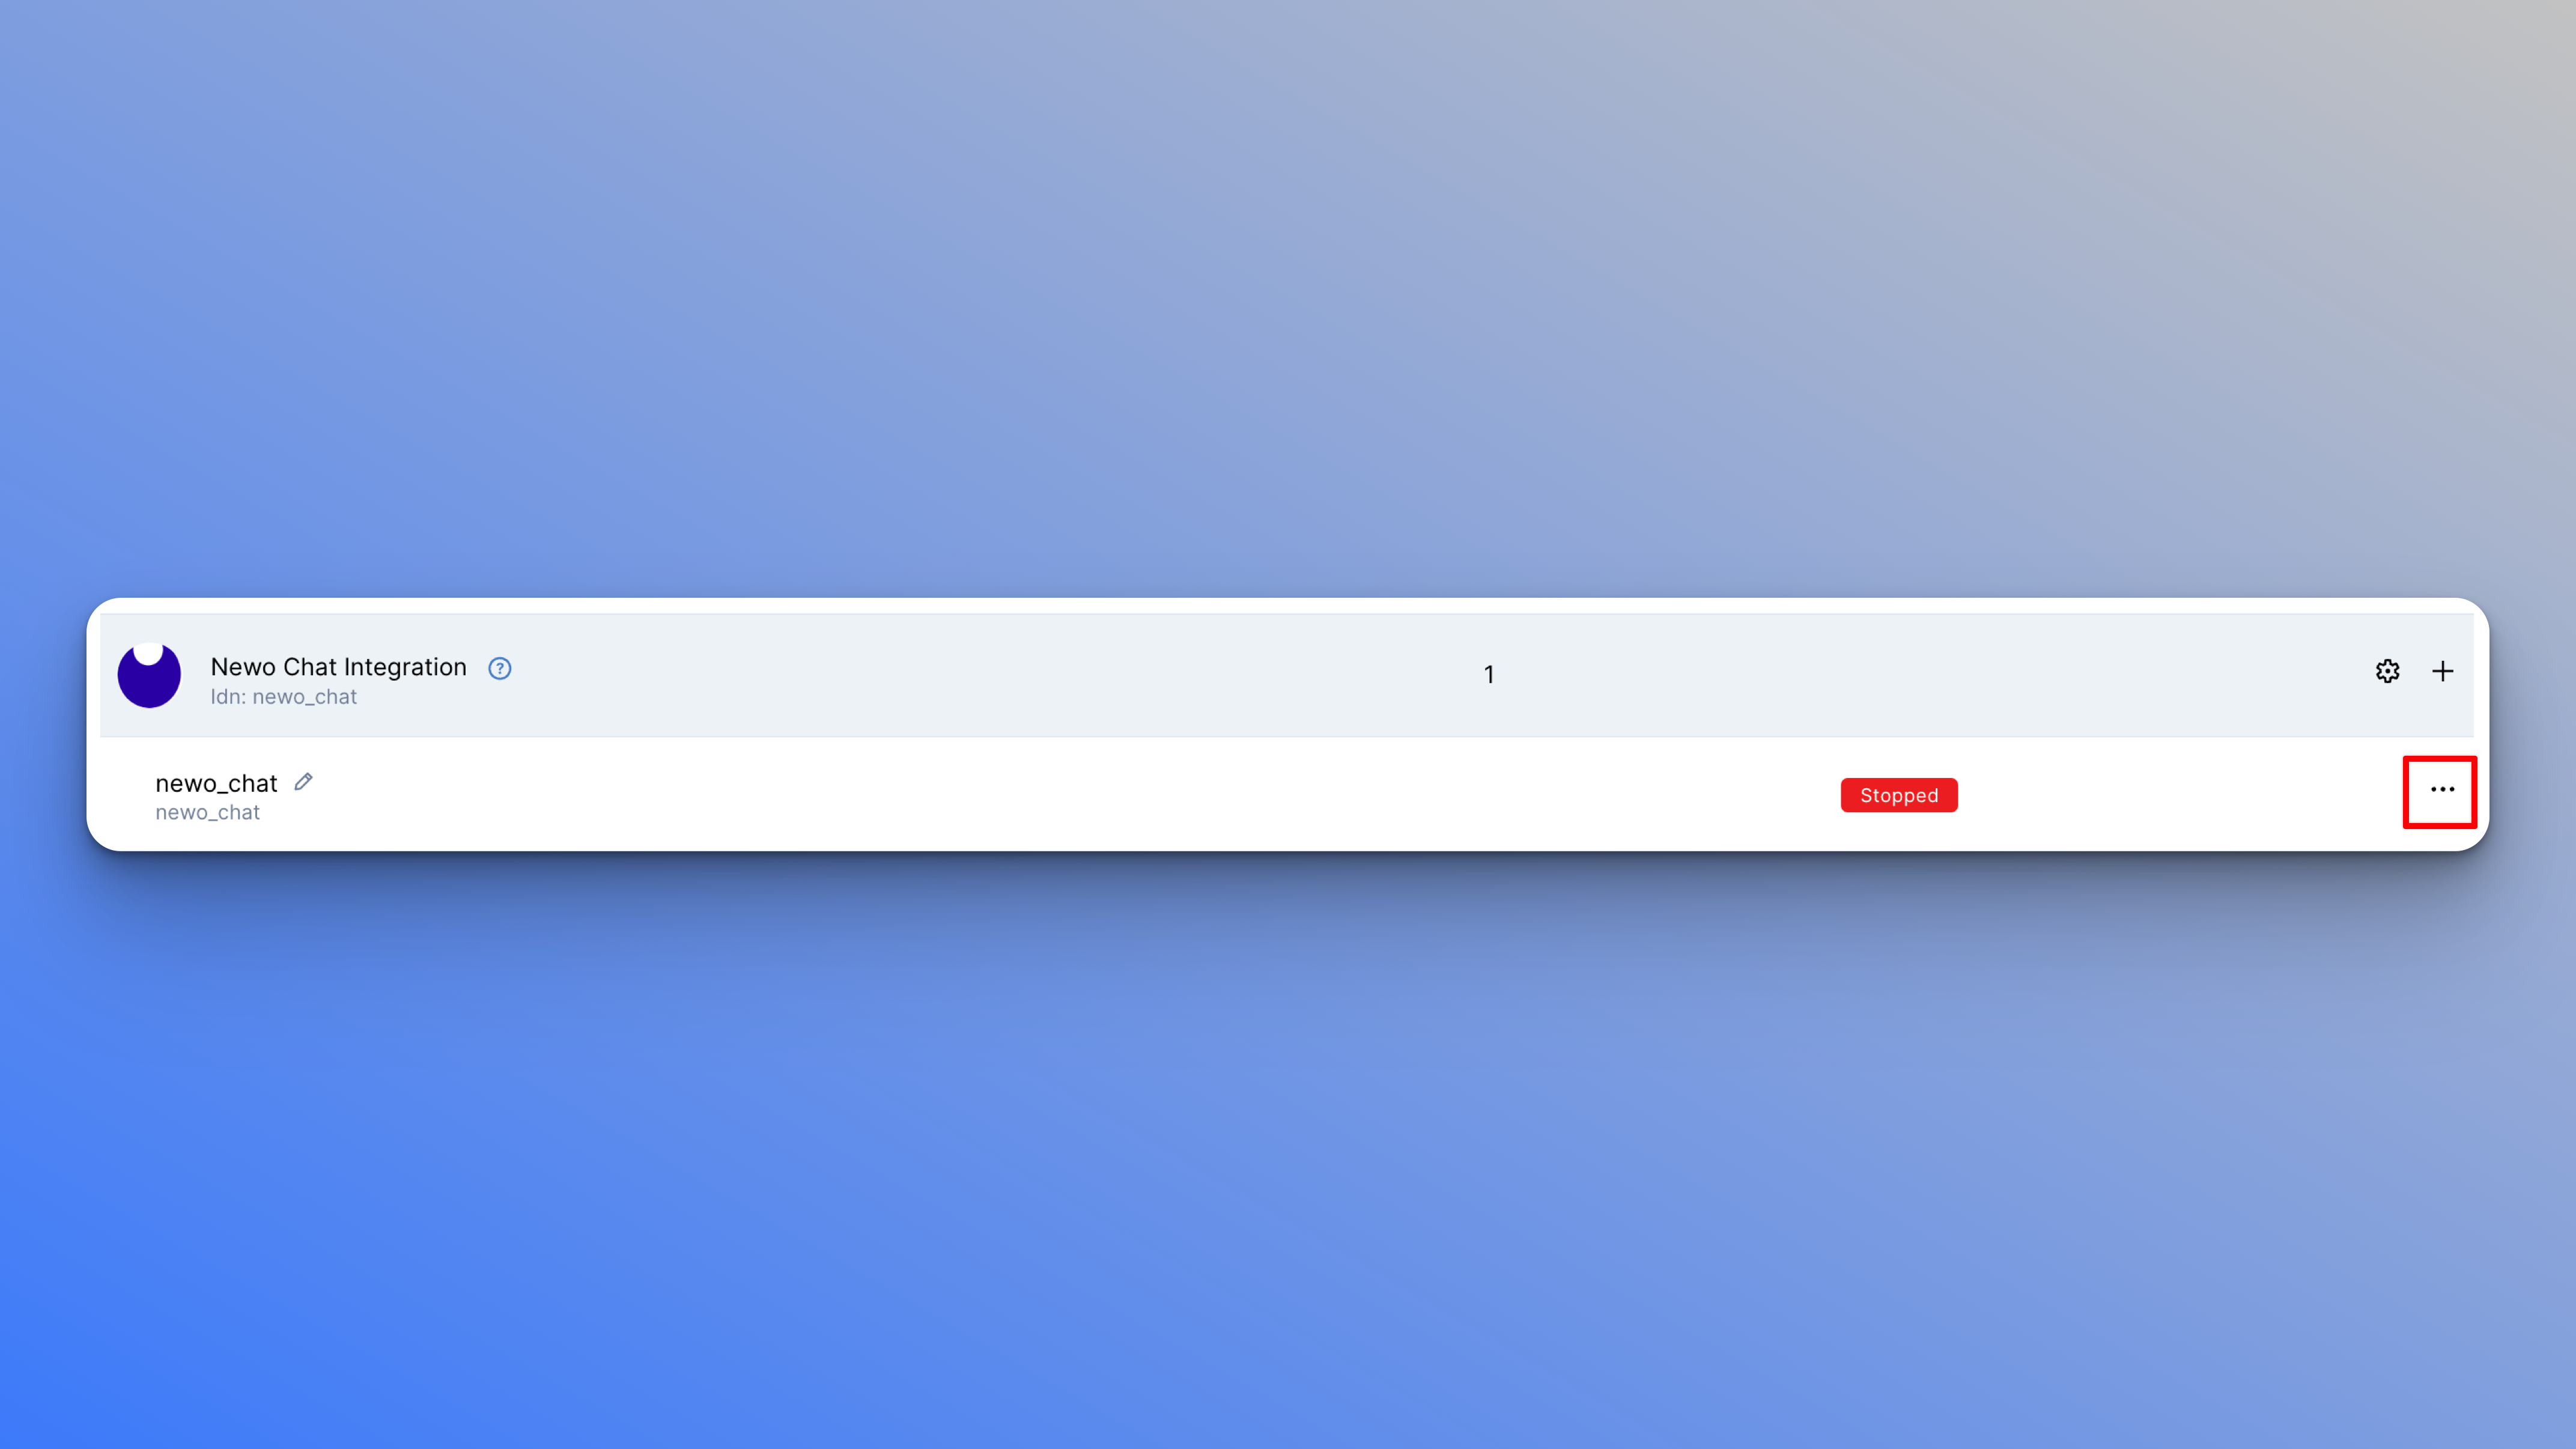
The connector should automatically be running. If not, and you see the status as Stopped, you will need to enable it.
- Navigate to the Integrations page from the left-side panel.
- Click the three dots icon on the right of the
newo_chatconnector.

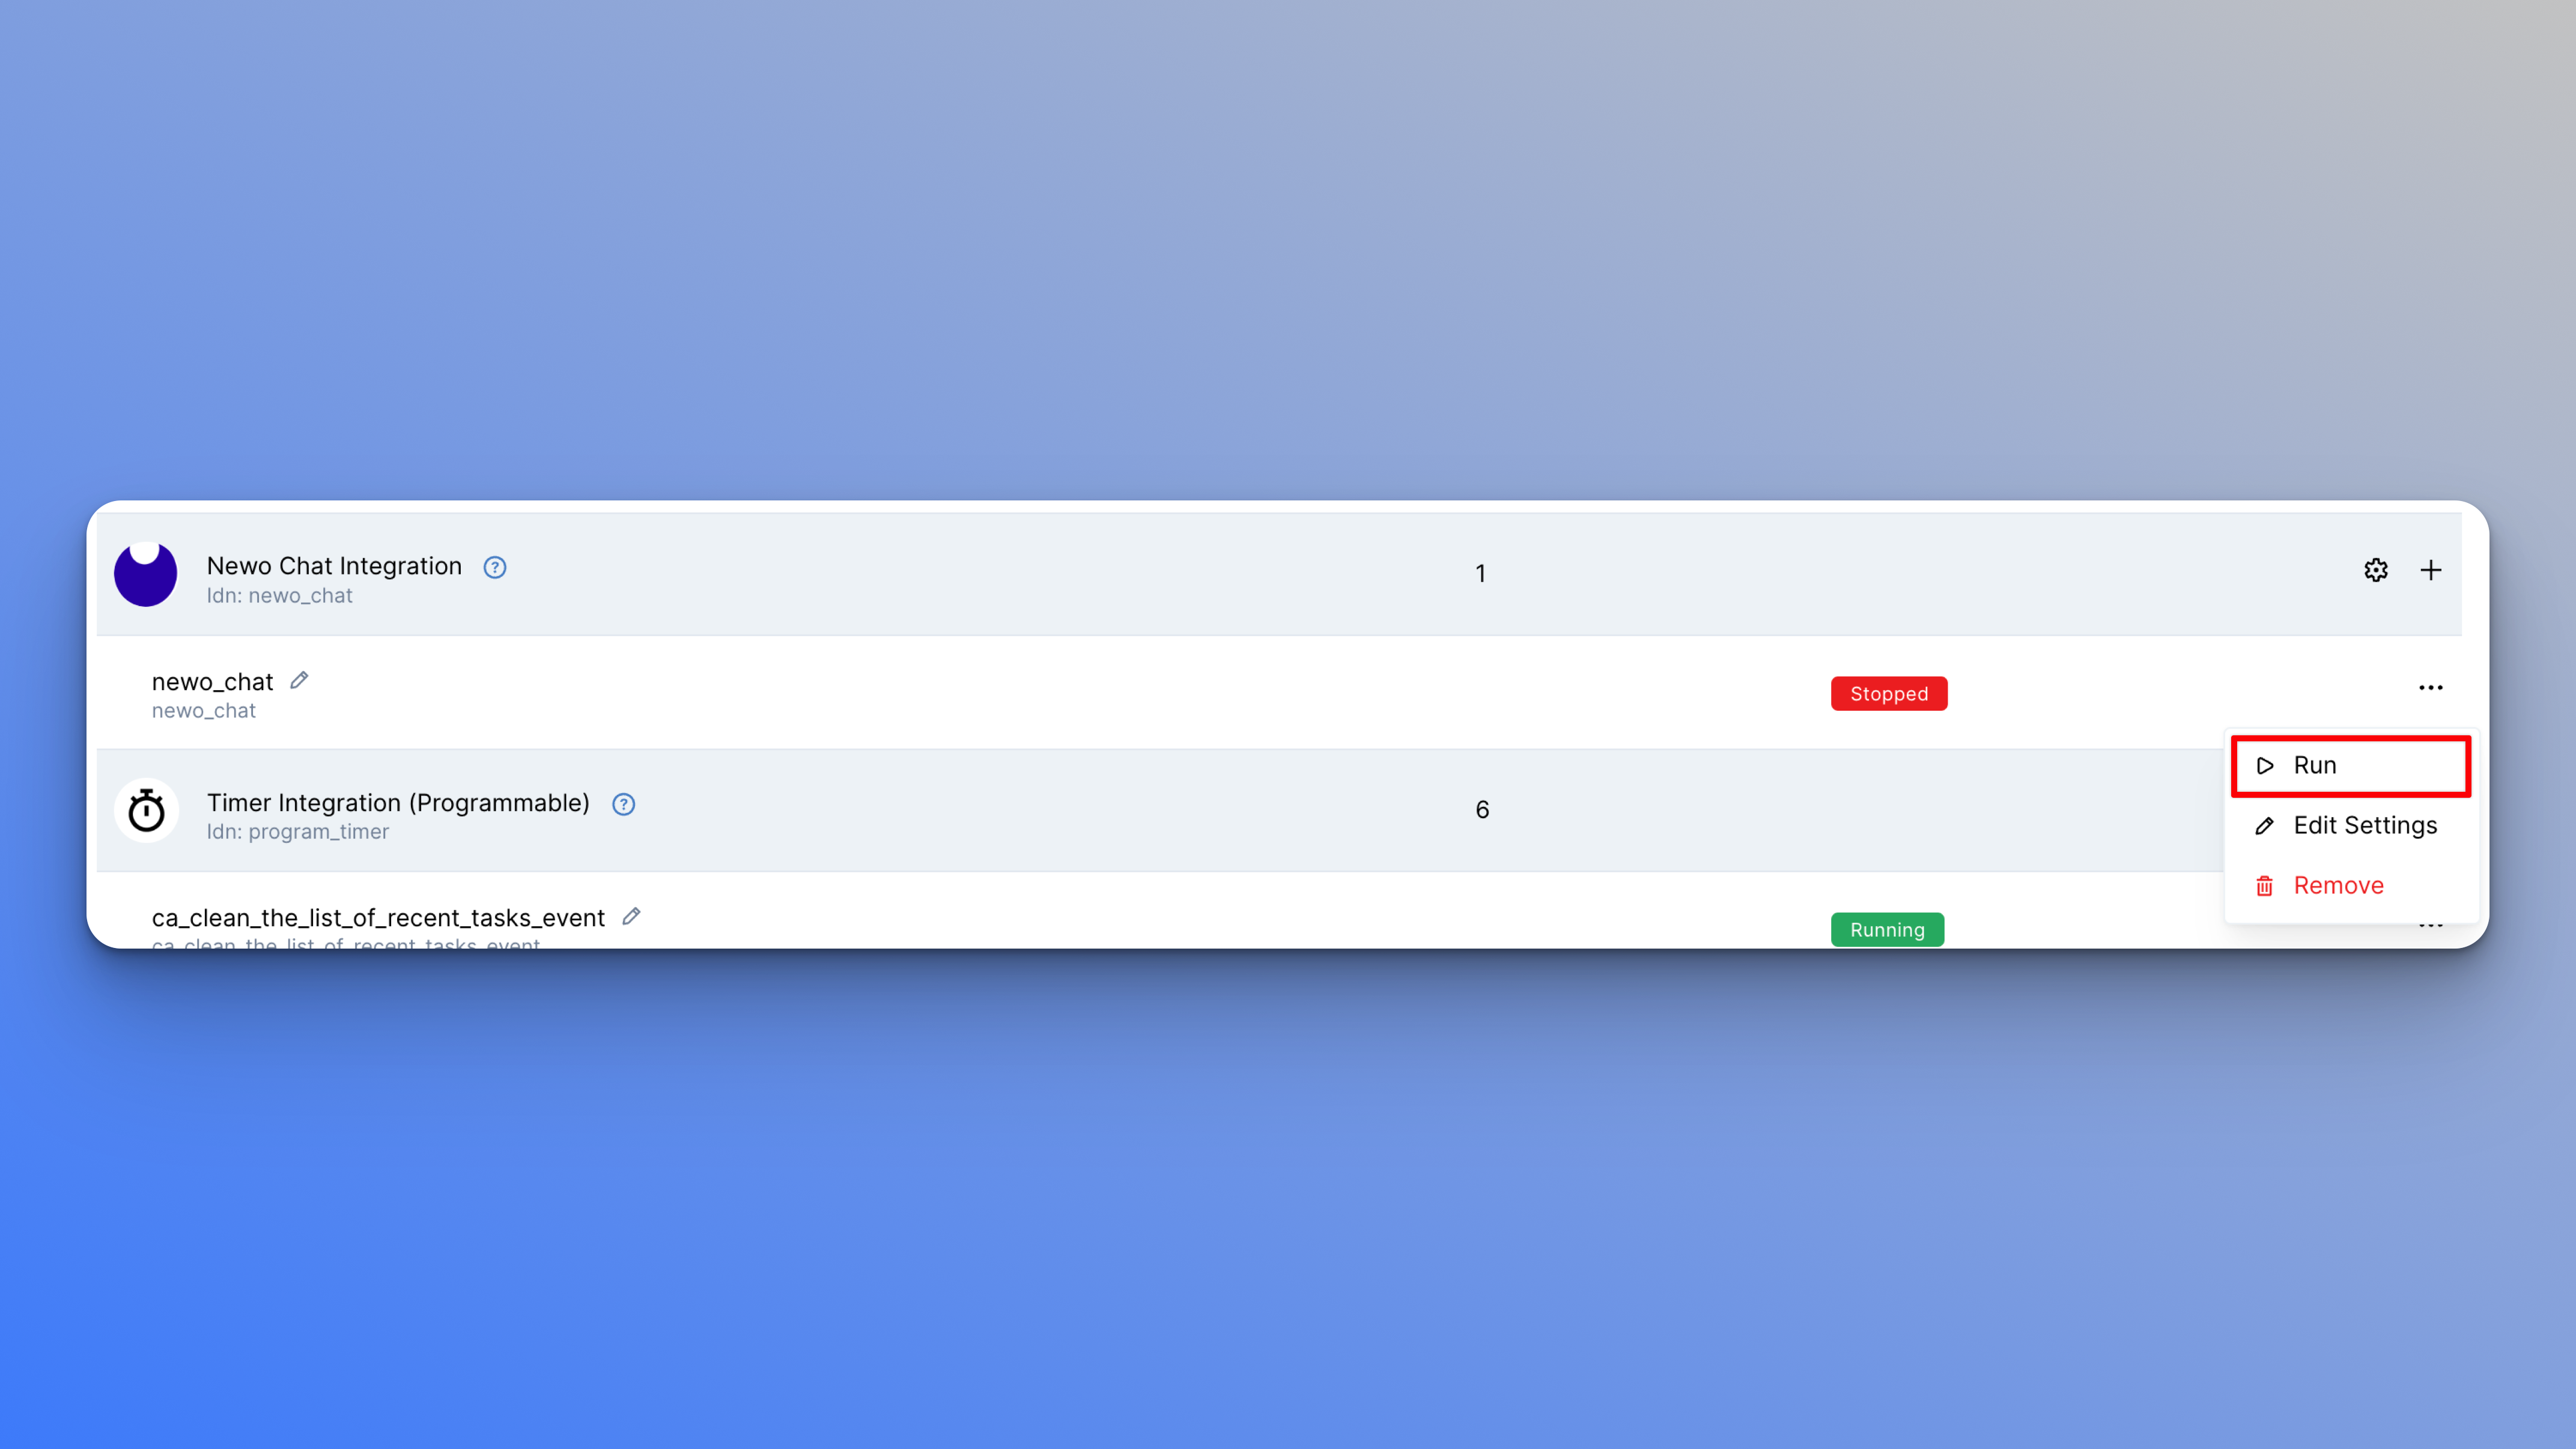
- Click Run. The status will change to
Running.

Client Website Base URL
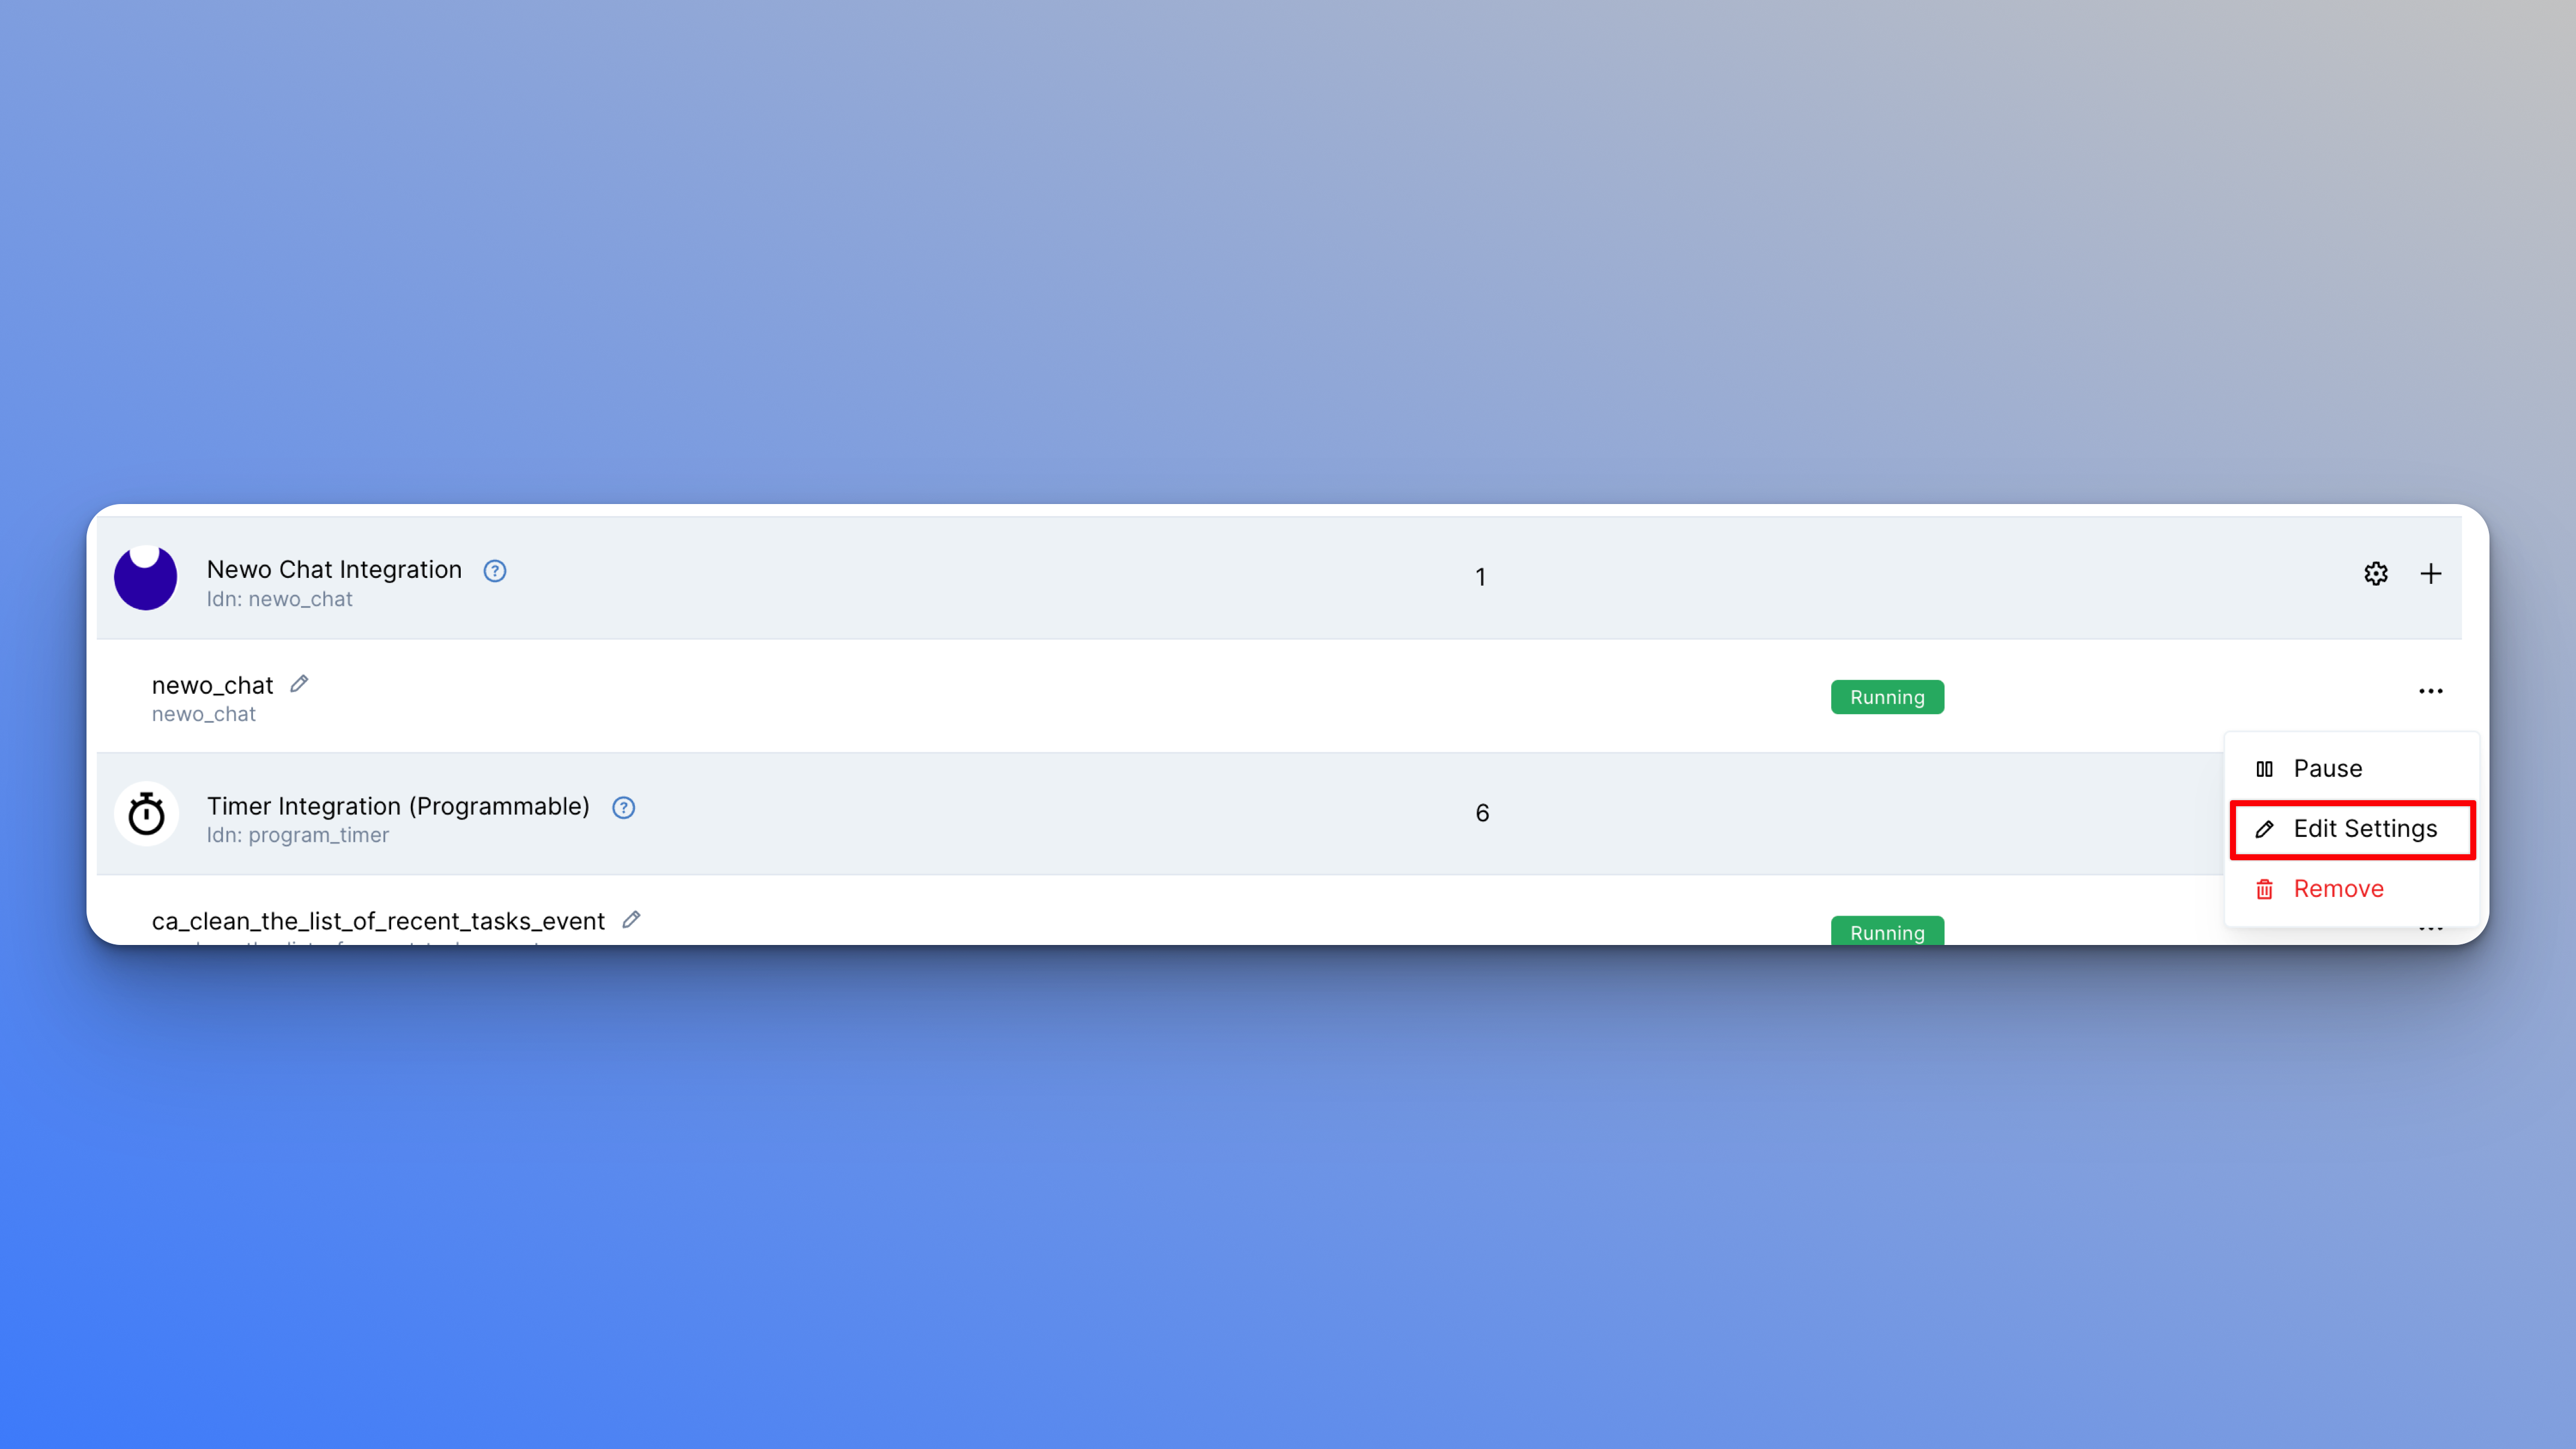
- Click the three dots icon next to the
newo_chatconnector.

- Click Edit Settings.

- For the
Client Website Base URL, add the website where you want to demo the Newo Chat, but with some slight modifications.- Let’s say you want the Newo Chat to work on
https://example.com. Add a-where there is a.which, in this case, would behttps://example-com. Website's that usewww, would like like this:https://www-example-com. - Add a web chat postfix
.webchat.newo.ai. For example:https://www-example-com.webchat.newo.ai
- Let’s say you want the Newo Chat to work on
- Enable the
Show-case Statussetting, which allows this demo feature to be turned on. - Click Save.
Demo the Newo Chat on a Website
To demo the Newo Chat on your selected website, follow these steps:
- Click the three dots icon on the right of the created connector.
- Click Edit Settings.
- Copy the
Client Website Base URLyou set previously and paste it into a new browser tab with the following additions:- Add
/?mode=newochat&client=YOUR_CLIENT_SECRETto the end. - Copy the generated
Client Secretand replaceYOUR CLIENT SECRET. The final URL for a production account will be, for example,https://example-com.webchat.newo.ai/?mode=newochat&client=09aea2b1-7112-4370-2528-2b4f0cb5051f.
- Add
- The entered URL will open the website with the Newo Chat icon at the bottom-right corner. You can now test out the functionality in this demo environment before going live.
Updated 12 days ago
