

Google Sheet setup
Prepare the Google Sheet
If you’ve created an agent using the Agent Creator, you will need access to the base Client Session Logs Google Sheet.
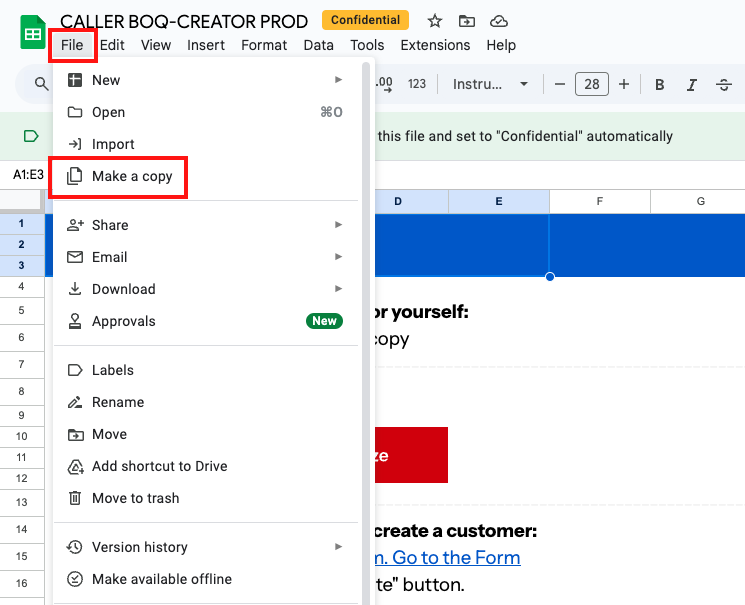
- Click File in the top tab of the Google Sheet and click Make a copy.
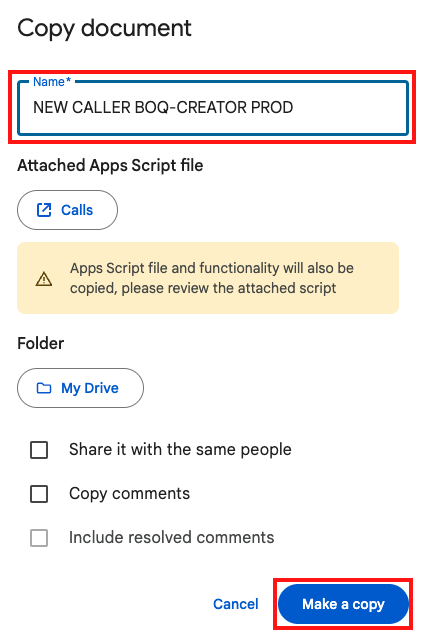
- Change the document's name (if needed) and click Make a copy.
You should now be able to edit your copy of the Google Sheet.
Configure Apps Script
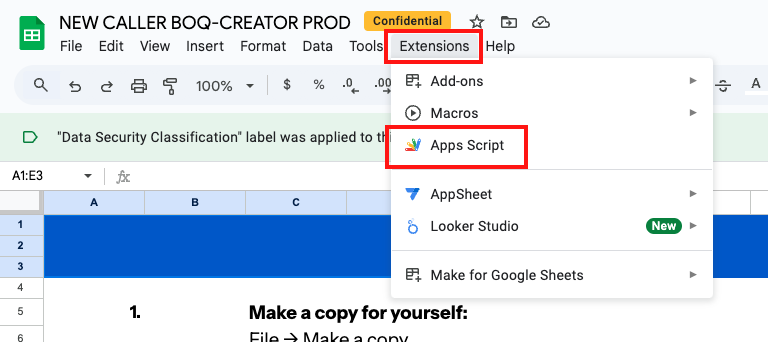
- Click Extensions in the top tab of the Google Sheet and click Apps Script.
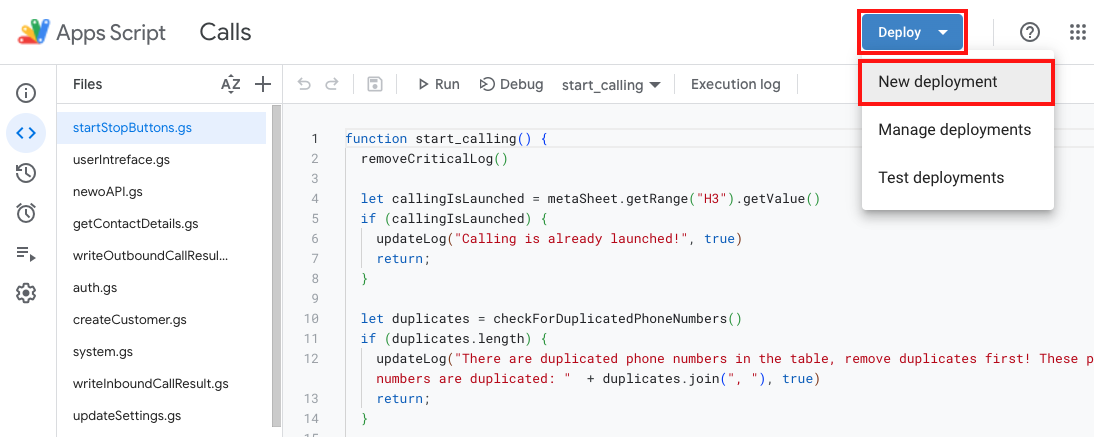
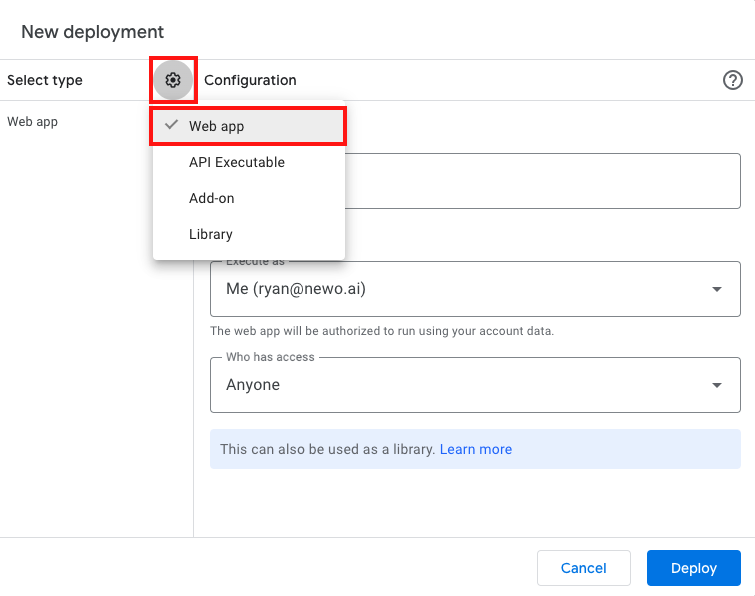
- Click Deploy in the top-right corner and select New deployment.
- Click the gear icon next to “Select type” and click Web app.
- In the configuration settings:
- Description: Add a brief description (e.g., business name or app purpose).
- Execute as: Choose your account.
- Who has access: Select Anyone.
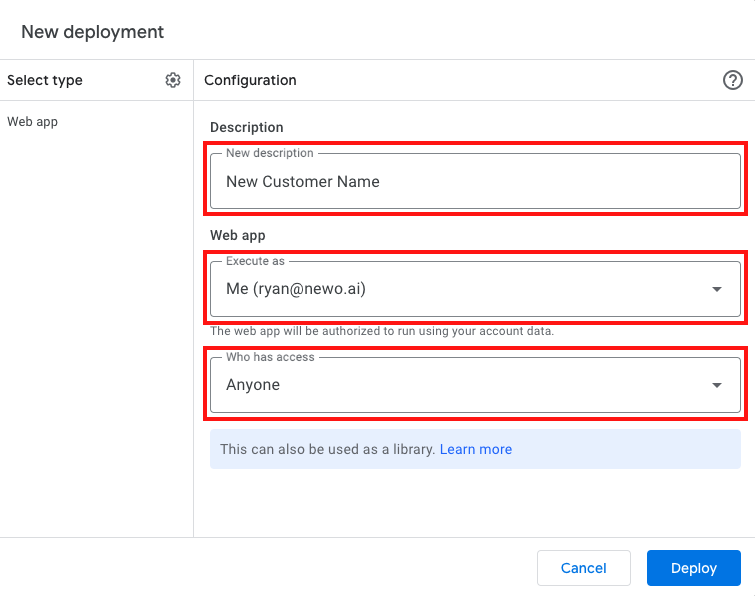
- Click Deploy.

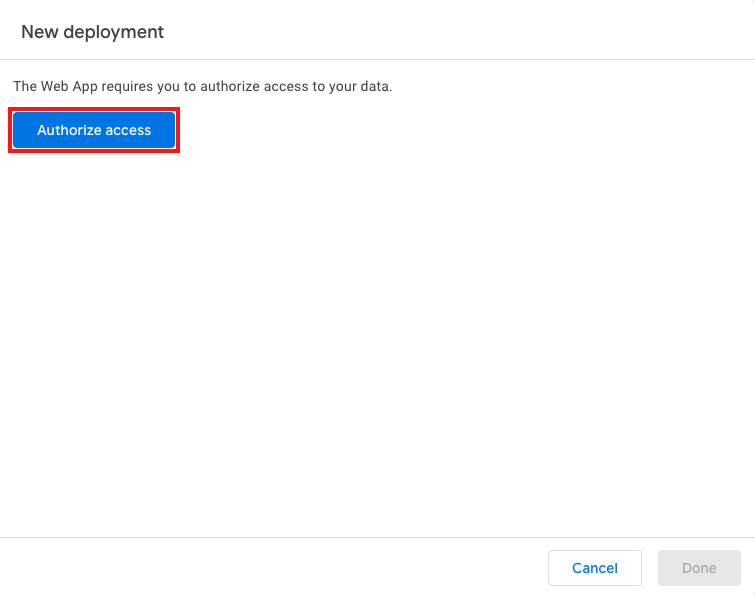
- Click Authorize access and sign into the account you selected in step 4.
- After deployment, click Copy to copy the generated Web app URL to your clipboard.
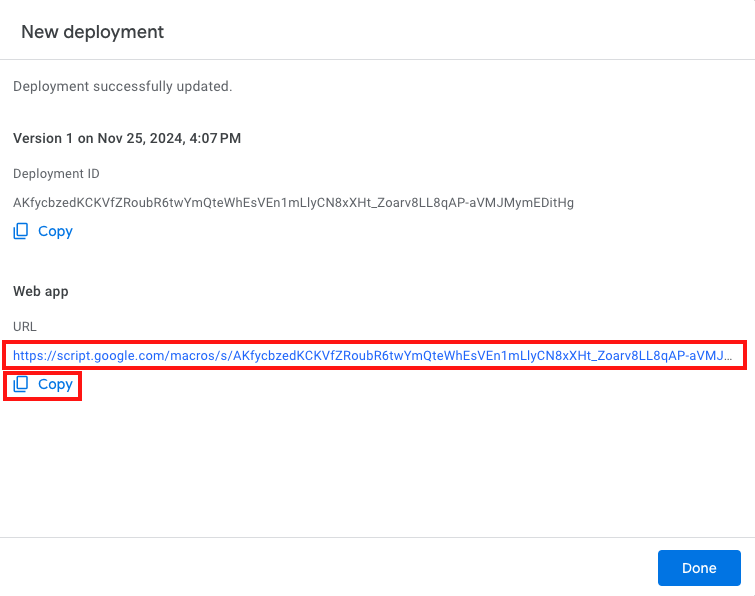
- Click Done to close the pop-up window.
Add the webhook to the Newo.ai platform
Let’s connect the Google Sheet to the Newo Platform using the webhook previously created:
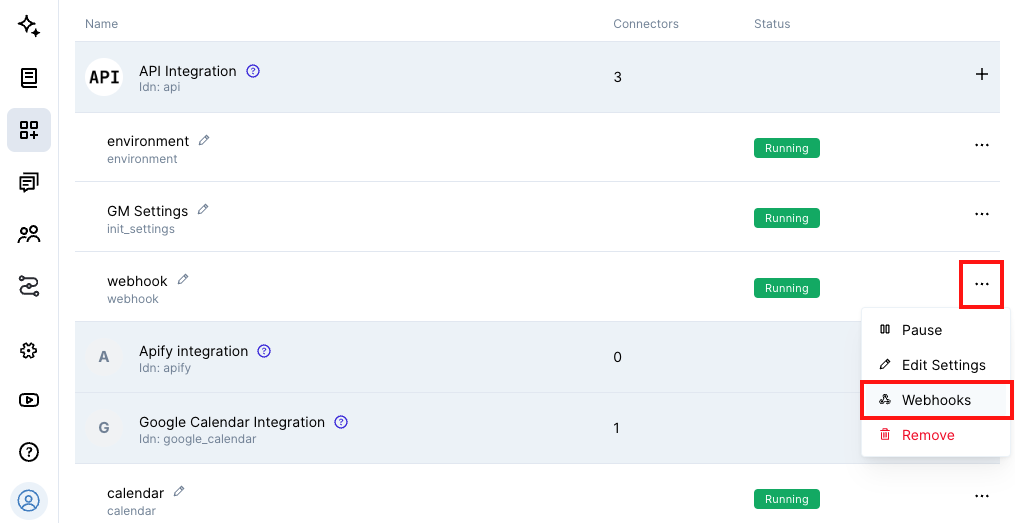
- Navigate to the Integrations page.
- Under the “API Integration” section, click the three dots next to the “webhook” connector and select Webhooks.
- Click + Add Webhook.
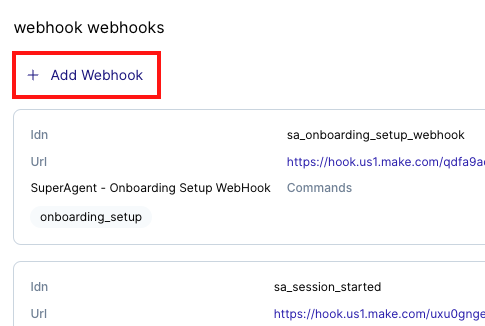
- Set any
idn(for example,call_table_url). - Paste the copied URL from the Google Sheet App Script into the
urlfield. - Add the following in the “Commands” field:
- get_contact_details
- update_inbound_record
- update_outbound_record
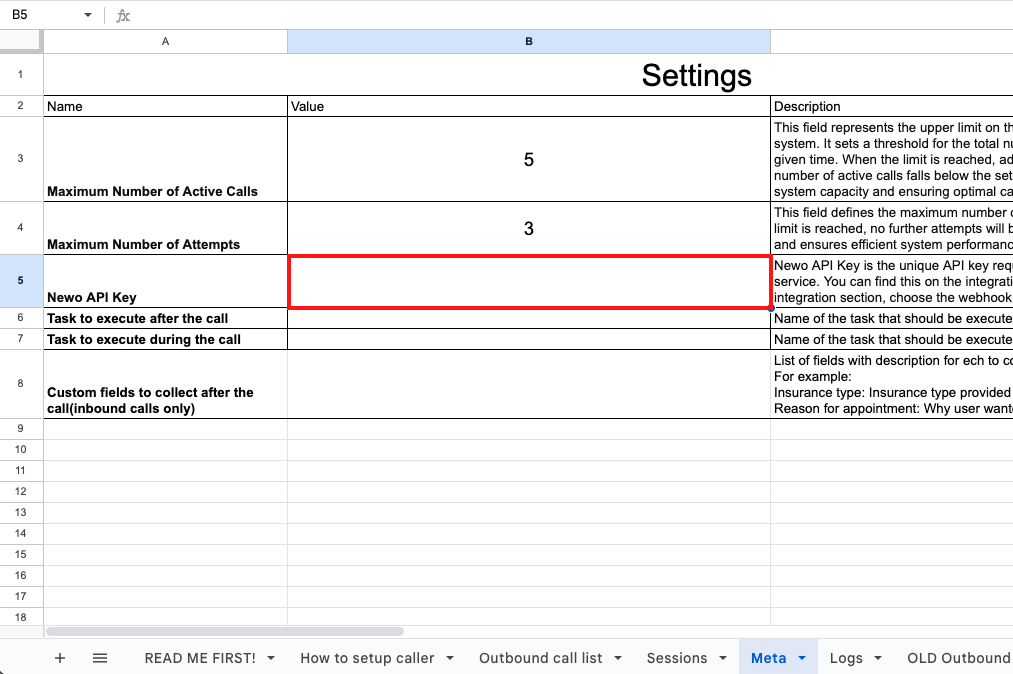
Add the API key to the Google Sheet
The final step involves transferring the API key to the Google Sheet by doing the following:
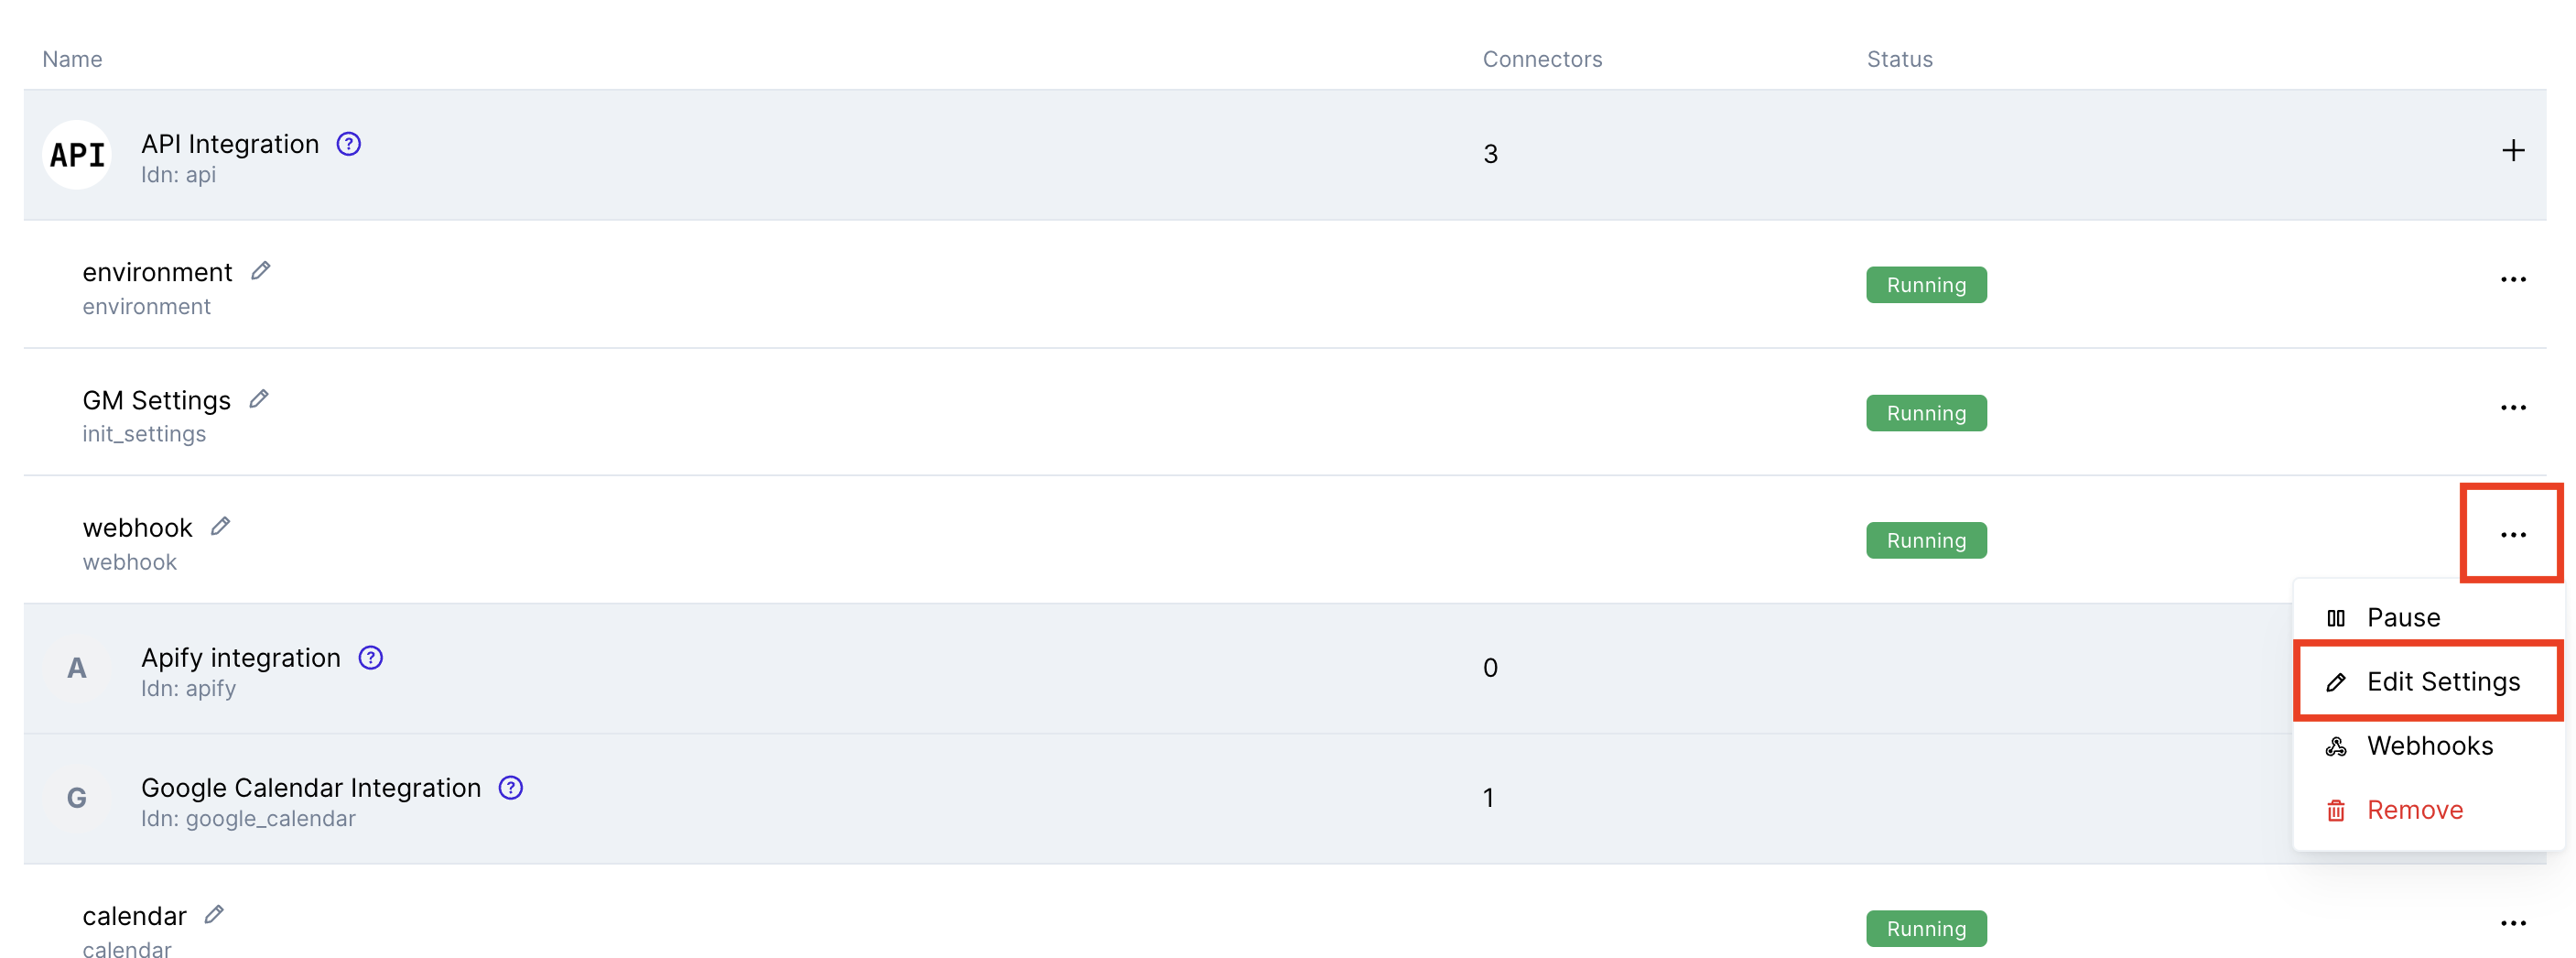
- Navigate to the Integrations page.
- Under the “API Integration” section, click the three dots next to the “webhook” connector and select Edit Settings.
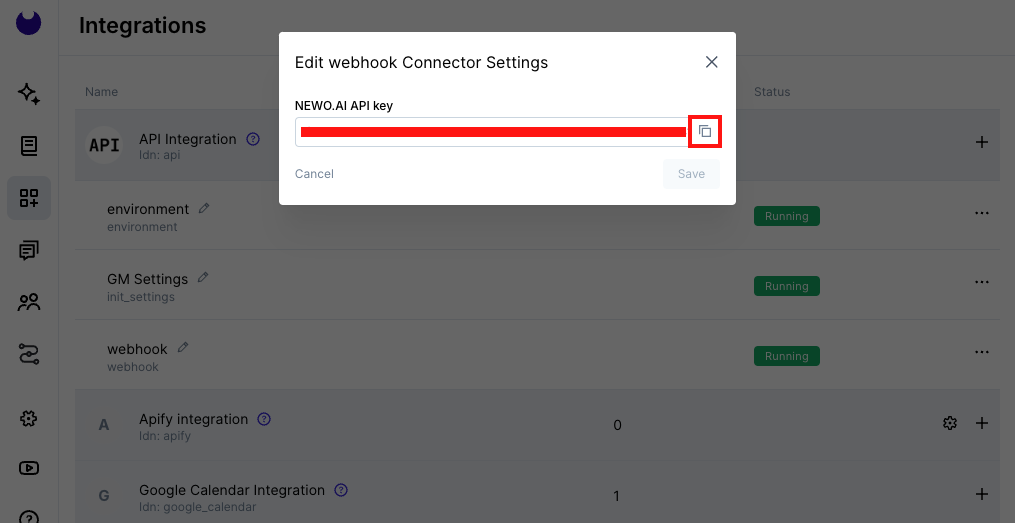
- Copy the “Newo.ai API Key” and paste it into the Google Sheet in cell B5 of the “Meta” tab.
Updated 3 months ago
Did this page help you?